
📱 Réamhrá
Scáileán scáinte? Níl tú i d'aonar. Déanann go leor anamacha cróga iarracht é a shocrú iad féin chun airgead a shábháil - ach sa deireadh go mbrisfidh siad rud éigin níos measa. Fuaim eolach?
Is féidir le hathsholáthar scáileáin DIY a bheith thar a bheith sásúil ... nó tromluí iomlán. Go háirithe nuair a dhéanann botúin rookie coitianta do shocrú a iompú ina shochraid do do ghuthán.
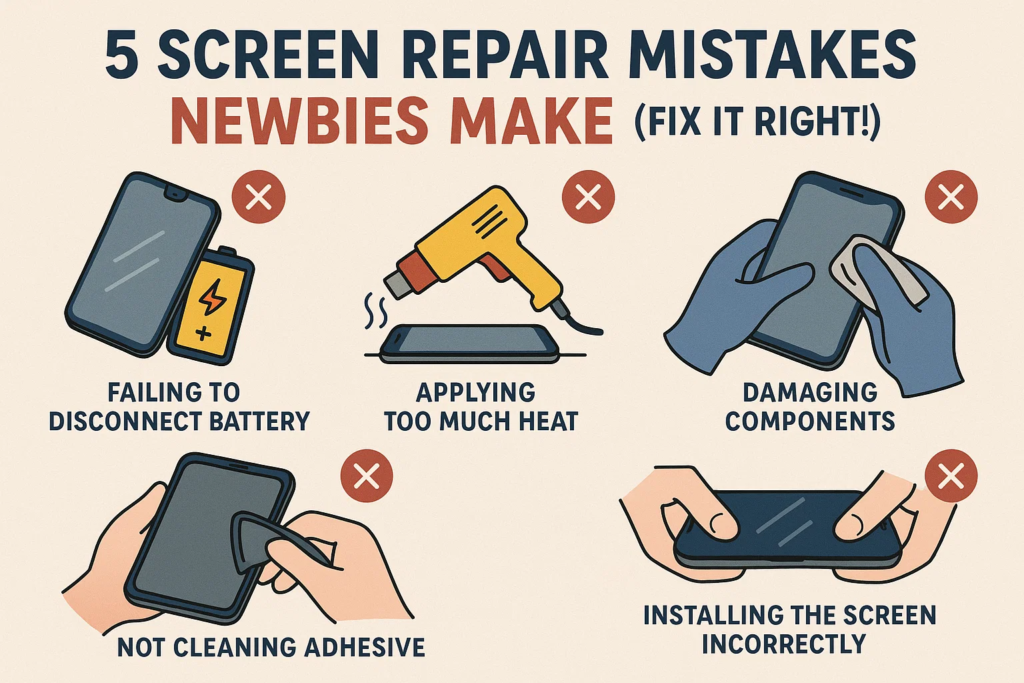
Ach ná bí buartha. Sa treoir seo, taispeánfaimid duit 5 botúin mharfacha a dhéanann daoine den chéad uair, conas iad a sheachaint, agus conas é a dhéanamh ar an mbealach ceart. Tarrthálaimis do ghuthán sula mbeidh sé ró-dhéanach.
❌ botún #1: Athsholáthar an Scáileáin Gan Cumhachtú As
Chuala tú riamh an frása “ag imirt le tine”? Sin é go díreach atá á dhéanamh agat má tá babhtáil scáileán agus an fón fós á gcumhachtú.
Cén Fáth Tá sé Contúirteach
- Riosca tú comhpháirteanna lárnacha gearrchiorcaireachta.
- An féidir sruthán do backlight IC nó níos measa - do mháthairchlár.
- Leictreachas statach? é breá ciorcaid bheo.
Cad is féidir dul mícheart
- Scáileán dubh tar éis athsholáthair
- Gan freagra tadhaill
- Boladh dóite = $$$ deisiú
✅ Déan Ceart é
- Cumhacht as an bhfón go hiomlán.
- Déan an ceallraí a dhícheangal chomh luath agus a osclaíonn tú an gléas.
- Mura bhfuil cinnte, fan ar a laghad 2 nóiméad tar éis múchadh.
❌ botún #2: Ag baint úsáide as Brute Force chun an Scáileán a Bhrú as
Níl tú i gcruachás cogaidh. Tá an scáileán greamaithe, ní bolted. Ach is féidir úsáid a bhaint as fórsa Bend an fráma, damáiste inmheánach, nó cáblaí sracadh.
Na Rioscaí
- Scáileáin briste taobh istigh
- Tithíocht lúbtha = ní shuífidh an scáileán flush
- Cáblaí flex stróicthe = gan taispeáint nó tadhall
✅ Déan Ceart é
- Úsáid a gunna teasa nó eochaircheap te greamachán a mhaolú.
- Sleamhnán a cárta plaisteach nó pry uirlis go cúramach.
- Bí foighneach. Lig don gliú é féin a scaoileadh.
❌ botún #3: Cáblaí Flex a chur isteach ar an mBealach Mícheart
Is cosúil go n-oirfeadh na nascóirí beaga seo ceachtar bealach - ach is gaiste é sin. Plugging sa treo mícheart nó á bhrú ar a mhalairt is féidir damáiste tromchúiseach a dhéanamh.
Comharthaí Rabhaidh
- Gan taispeáint fiú tar éis tosaithe
- Línte aisteach nó flickering
- Scáileán dubh láithreach ar chumhacht
✅ Déan Ceart é
- Cuardaigh le haghaidh an bioráin órga agus treo notch.
- Ná bhfeidhm! Mura sleamhnaíonn sé isteach go héasca, tá tú ag déanamh mícheart.
- Úsáid tweezers, ní méara.
❌ botún #4: Neamhaird a thabhairt ar an Greamachán Séalaithe nó Gasket
Seans go gceapfá, "Níl ann ach gliú." Mícheart. An séala dubh rubair sin coinníonn deannaigh agus uisce amach. Scipeáil air, agus beidh aiféala ort an chéad uair a dhoirteann tú uisce ar do ghuthán.
Na hIarmhairtí
- Coirnéil scáileáin scaoilte
- Damáiste uisce
- DIRT taobh istigh = teagmháil unresponsive
✅ Déan Ceart é
- Bain gach greamachán d'aois go hiomlán.
- Cuir iarratas isteach OEM-chaighdeán téip ina saothraítear rónta nó gaiscéid réamh-ghearrtha.
- Teas go héadrom tar éis tionóil go nascáil gliú a athghníomhachtú.
❌ botún #5: An Fón a Shéalú Roimh Thástáil
Ní thosaíonn tú do ghuthán ach chun a fháil amach nach n-oibríonn an scáileán nua. Anois caithfidh tú é a oscailt ar fad arís.
Cén Fáth Tá sé Riosca
- Cuireann sé am amú agus greamachán.
- Déanann athoscailt lagú uiscedhíonta.
- Tá baol ann go ndéanfaidh tú dochar dó arís le linn ath-dhíchóimeáil.
✅ Déan Ceart é
- Roimh an tionól deiridh, ceangail an scáileán nua agus tosaithe suas.
- Tástáil le haghaidh:
- Freagra dteagmháil
- Gile
- Picteilíni marbh
- Braiteoir méarloirg (má leabaithe)
⚠️ Botúin Bónais le Seachain
Turraing Statach
- Bain úsáid as i gcónaí lámhainní frithstatacha nó mata. Is féidir le zap amháin do scáileán IC a fhriochadh.
Ceallra ar chlé plugáilte isteach
- Fiú má tá an fón múchta, sreafaí reatha. Díphlugáil an ceallraí ar dtús.
scriúnna a chailleadh nó na cinn mícheart a úsáid
- Is féidir méideanna scriú a mheascadh suas Pierce sraitheanna inmheánacha. Sórtáil iad de réir ceantair.
🔧 Uirlisí Riachtanacha do Núíosaigh
- Uirlisí plaisteacha pry (ní miotail)
- Cupán shúchán
- Gunna teasa / eochaircheap te
- Mata frith-statach
- Mata scriú maighnéadach
- Tacar scriúire cruinnis
- Greamachán athsholáthair
🛠️ Athsholáthar Scáileáin Sábháilte DIY: Céim ar Chéim
1. Prep
- Cumhacht as
- Bailigh uirlisí
- Spás oibre glan
2. Díchóimeáil
- Teas imill an scáileáin
- Go réidh pry oscailte
- Déan cáblaí ceallraí agus scáileáin a dhícheangal
3. Tástáil
- Ceangail scáileán nua
- Feidhmeanna tosaithe agus tástála
4. Reassemble
- Bain gliú d'aois
- Cuir greamachán nua i bhfeidhm
- Suiteáil scáileán nua
- Scriúnna slán
- Glanadh deiridh
🤔 Ar cheart duit DIY i ndáiríre?
Bímis fíor: Ní bhaineann DIY le gach duine.
Suntas:
- Sábhálann airgead
- Sástacht é a shocrú duit féin
Cuireann:
- Gan bharántas
- Riosca ard teip
- Tógann am
Leid: Má chosnaíonn an fón níos mó ná $500, b'fhéidir gur mhaith leat é a fhágáil faoi na buntáistí—ach amháin má tá tú an-mhuiníneach.
✅ Conclúid
Is féidir scáileán do ghutháin a athsholáthar go hiomlán -má dhéanann tú botúin rookie a sheachaint. Ó do ghléas a chumhachtú go dtí tástáil roimh an tionól deiridh, tá tábhacht le gach céim.
Bí cúramach. Bí foighneach. Bí ullamh.
Agus thar aon rud eile, ná Rush é. Do scáileán (agus sparán) go raibh maith agat.
❓ Ceisteanna Coitianta
1. Cad a tharlóidh mura gcuirtear mo scáileán ar siúl tar éis athsholáthair?
Seiceáil nasc ceallraí agus treo cábla faoi dhó. D'fhéadfadh sé a bheith ina chábla solúbtha nach bhfuil ina shuí i gceart.
2. An féidir liom seanghreamachán a athúsáid?
No.. Ní nascfaidh an sean-ghliú go daingean. Cuir greamachán nua i bhfeidhm le haghaidh séalaithe.
3. An bhfuil téamh riachtanach do gach samhail fón?
Tá, go háirithe le haghaidh samhlacha níos nuaí. Éiríonn an ghreamaitheach níos láidre le himeacht ama - bogann teas go sábháilte é.
4. An gcaillfear friotaíocht uisce tar éis deisiú DIY?
Is dócha, is ea – mura n-úsáideann tú gaiscéid agus séalaithe ceart uiscedhíonach.
5. An bhfuil tosaithe tástála ag teastáil fiú le haghaidh scáileáin úrnua?
Cinnte. Ní chiallaíonn nua foirfe. Déan tástáil i gcónaí roimh shéalú deiridh.


