
Introduction to iPhone LCD Screen Touch IC Transplantation
Ever experienced a frustrating moment where your iPhone screen stops responding to your touch? Yep — chances are, the Touch IC (Integrated Circuit) might be the culprit. This tiny but essential chip acts as the brain behind your iPhone’s touch functionality. In this article, we’ll dive deep into the world of iPhone LCD screen Touch IC transplantation — what it is, how it works, and why it matters for both users and repair professionals.
What is a Touch IC?
Function of Touch IC in an iPhone
The Touch IC is a small microchip responsible for detecting and processing the touch signals from your iPhone’s screen. When you tap, swipe, or pinch, this chip translates those actions into digital instructions your phone can follow. It connects directly to the touchscreen digitizer, ensuring smooth and accurate operation.
Common Signs of Touch IC Failure
Some obvious signs that your Touch IC might be acting up include:
- Unresponsive screen taps
- Random ghost touches
- Touch function delays
- Total freeze in touch responsiveness while other functions work fine
Why iPhone Touch IC Transplantation Matters
Cost-Effective Repairs
Rather than replacing an entire motherboard or screen assembly, transplanting the Touch IC can be a budget-friendly solution — saving both time and money.
Restoring Device Functionality
A successful IC transplant can fully restore your iPhone’s touch responsiveness without needing a complete overhaul, keeping your device in perfect working order.
Understanding iPhone Screen Structure
Layers of an iPhone LCD Screen
An iPhone display isn’t just a single piece of glass. It’s made up of several key components:
- Glass: The top protective layer.
- Touch Digitizer: Detects touch input.
- LCD Panel: Displays images.
- Backlight: Illuminates the screen for visibility.
Position and Role of the Touch IC in the Display Assembly
The Touch IC typically sits on the phone’s motherboard, managing signals between the digitizer and the processor. Its strategic placement makes it vulnerable to physical stress or manufacturing flaws, especially in older iPhone models.
Common Issues Related to iPhone Touch IC
Symptoms of a Faulty Touch IC
- Intermittent or total touch failure
- Vertical gray lines on display
- Screen flickering or ghost touch issues
Known iPhone Models Affected
iPhone 6 Series
Infamously known for “Touch Disease,” especially the iPhone 6 Plus.
iPhone 7 Series
Less common, but Touch IC issues do occur.
iPhone X Series
Even with OLED technology, touch-related problems linked to IC faults have been reported.
Tools and Equipment Required for Touch IC Transplantation
Essential Repair Tools
- Precision screwdrivers
- Plastic opening tools
- Tweezers
- Suction cup
Specialized IC Removal and Reballing Equipment
- Hot air rework station
- Microscope
- BGA reballing kit
- Solder paste and flux
Safety and ESD Protection Gear
To prevent static damage, you’ll need:
- Anti-static wrist straps
- ESD mats
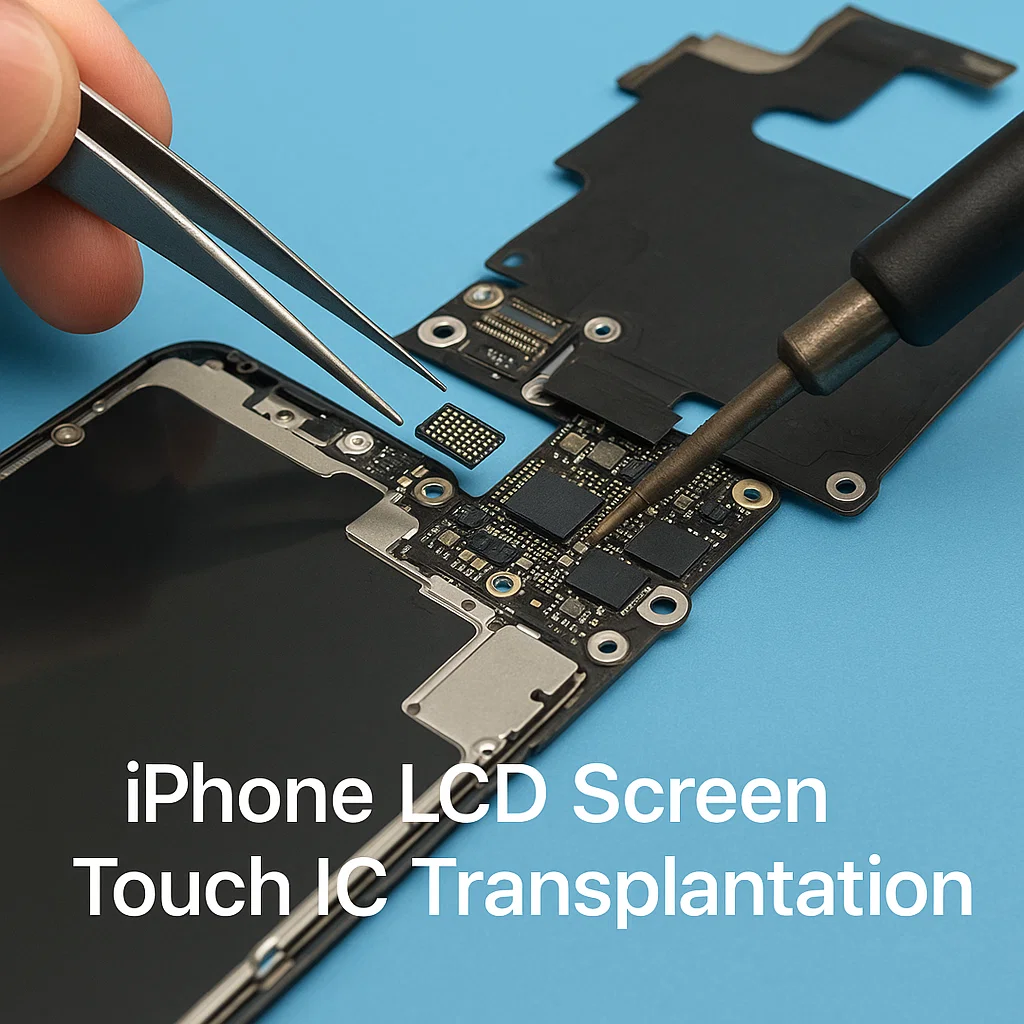
Step-by-Step Process of Touch IC Transplantation
Diagnosing the Issue
Use specialized tools like multimeters and thermal cameras to confirm the Touch IC is defective.
Removing the Damaged Touch IC
Carefully desolder the faulty chip using a hot air station under a microscope.
Cleaning the IC Pad
Clean residual solder with solder wick and apply fresh flux.
Reballing or Preparing a New Touch IC
Either reball the old IC or prepare a new one by applying solder balls for a perfect fit.
Installing the New Touch IC
Use precision tweezers to position the IC, then apply controlled heat to secure it.
Final Testing and Quality Check
After reassembly, test touch functionality and run diagnostic software.
Tips and Best Practices for a Successful IC Transplant
Maintaining the Right Temperature
Avoid overheating — too much heat can warp the motherboard.
Proper Handling of Micro-Components
Use precision tools and a steady hand to avoid damage.
Importance of Patience and Precision
Rushing the job can ruin the device beyond repair.
Common Mistakes to Avoid
Overheating the Motherboard
Excessive heat can cause irreparable damage.
Incorrect Reballing Techniques
Improperly aligned or missing solder balls can lead to failed repairs.
Poor Soldering Practices
Use high-quality solder and flux for a clean job.
Risks and Challenges in Touch IC Transplantation
Potential for Further Damage
One slip and you might damage neighboring components.
Loss of Device Data
Removing components always carries data risks.
Voiding Warranty
Unauthorized repairs void official Apple warranties.
Professional vs DIY Touch IC Repair
Pros and Cons of DIY Repairs
Pros: Saves money, good for learning.
Cons: High risk of failure without the right tools or experience.
When to Seek Professional Help
If you’re unsure about handling micro soldering, it’s best to leave it to certified repair shops.
Market Demand for iPhone Touch IC Repair Services
Growing Industry Trends
With increasing phone prices, repair services for Touch IC and similar repairs are booming.
Opportunities for Repair Technicians
Skilled technicians can turn this into a profitable niche business.
Cost Analysis of Touch IC Transplantation
Cost of Replacement Parts
Touch ICs are relatively inexpensive — often under $15.
Labor Costs
Professional services can range from $50 to $150 depending on complexity.
Comparison with Complete Screen Replacement
Full screen replacements often exceed $200–$300, making IC repair a cost-effective alternative.
Legal and Ethical Considerations
Handling Customer Data
Always back up and protect personal data before repairs.
Use of Genuine vs Aftermarket Parts
Using genuine parts ensures long-term reliability, though aftermarket options are often cheaper.
Future of Touch IC Technology in Smartphones
Advancements in Integrated Displays
Newer displays integrate touch sensors directly into the screen, reducing dependency on separate IC chips.
Reduced Dependence on Separate IC Components
Modern smartphones may gradually phase out individual Touch ICs, leading to fewer such repairs.
Conclusion
In a world where smartphone repairs are getting pricier, mastering iPhone Touch IC transplantation offers a cost-effective and sustainable option. It demands skill, patience, and the right tools — but the rewards for both users and repair technicians are worth it. Whether you’re a tech enthusiast or a professional repairer, understanding this process can save devices and dollars alike.
FAQs
Q1: Can a faulty Touch IC be fixed without replacement?
A: Rarely. Most cases require either reballing or complete replacement.
Q2: How long does Touch IC transplantation take?
A: Typically 30 to 60 minutes with the right tools and experience.
Q3: Is it safe to do Touch IC repair at home?
A: Only if you have proper equipment, training, and ESD safety measures in place.
Q4: Will replacing the Touch IC affect Face ID or other features?
A: It shouldn’t, as long as the repair is precise and other components remain untouched.
Q5: How can I tell if my iPhone has a Touch IC problem?
A: Look for symptoms like unresponsive touch, ghost touches, or gray flickering lines on the screen.
Please don’t forget to leave a review.
Explore more by joining me on Patreon


