
📱 Úvod
Prasknutá obrazovka? Nie si sám. Mnoho statočných duší sa to pokúša opraviť sami, aby ušetrili peniaze – len aby nakoniec niečo rozbili horšie. Znie to povedome?
Výmena obrazovky vlastnými rukami môže byť super obohacujúca... alebo totálna nočná mora. Najmä keď bežné chyby začiatočníkov premenia vašu opravu na pohreb vášho telefónu.
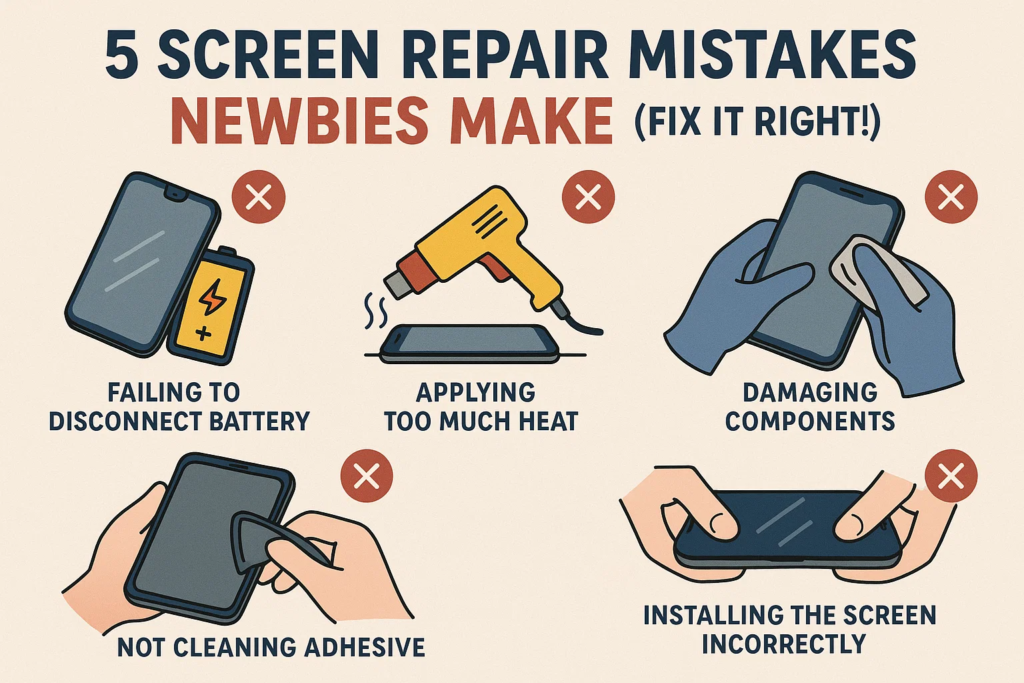
Ale neprepadajte panike. V tomto návode, ukážeme vám 5 smrteľné chyby, ktoré robia prváčikovia, ako sa im vyhnúť, a ako na to urob to správnym spôsobom. Zachráňme váš telefón skôr, než bude neskoro.
❌ Chyba #1: Výmena obrazovky bez vypnutia
Už ste niekedy počuli frázu „hrať sa s ohňom“? To je presne to, čo robíte, ak áno vymeniť obrazovku, keď je telefón stále zapnutý.
Prečo je to nebezpečné
- Riskujete skratovanie kľúčových komponentov.
- Môže spáliť vaše podsvietenie IC alebo ešte horšie – vaša základná doska.
- Statická elektrina? to miluje živé obvody.
Čo sa môže pokaziť
- Čierna obrazovka po výmene
- Žiadna odozva na dotyk
- Spálený zápach = $$$ oprava
✅ Urob to správne
- Vypnite telefón úplne.
- Hneď po otvorení zariadenia odpojte batériu.
- Ak si nie ste istý, počkaj aspoň 2 minút po vypnutí.
❌ Chyba #2: Použitie hrubej sily na vypáčenie obrazovky
Nie ste v preťahovaní lanom. Obrazovka je lepené, nie je priskrutkovaná. Ale použitie sily môže ohýbať rám, poškodiť vnútorné časti, alebo trhať káble.
Riziká
- Vnútri rozbité úlomky obrazovky
- Ohnuté puzdro = obrazovka nebude sedieť v jednej rovine
- Roztrhané flex káble = žiadny displej ani dotyk
✅ Urob to správne
- Používať teplovzdušná pištoľ alebo horúcu podložku na zmäkčenie lepidla.
- Snímka a plastová karta alebo nástroj opatrne vypáčte.
- Buďte trpezliví. Nechajte lepidlo samo uvoľniť.
❌ Chyba #3: Nesprávne vloženie káblov Flex
Tieto malé konektory vyzerajú, že sa hodia do oboch strán – ale to je pasca. Zapojenie nesprávnym smerom resp prinútiť to naopak môže spôsobiť vážne poškodenie.
Výstražné znamenia
- Žiadny displej ani po spustení
- Čudné čiary alebo blikanie
- Okamžitá čierna obrazovka po zapnutí
✅ Urob to správne
- Hľadajte zlaté kolíky a smer zárezu.
- Nikdy nenúťte! Ak sa nezasunie ľahko, robíš to zle.
- Použite pinzetu, nie prsty.
❌ Chyba #4: Ignorovanie tesniaceho lepidla alebo tesnenia
Môžete si myslieť, "Je to len lepidlo." Nesprávne. To čierne gumené tesnenie chráni pred prachom a vodou. Preskočte to, a budete to ľutovať, keď prvýkrát rozlejete vodu na telefón.
Dôsledky
- Uvoľnené rohy obrazovky
- Poškodenie vodou
- Špina vo vnútri = nereagujúci dotyk
✅ Urob to správne
- Úplne odstráňte všetko staré lepidlo.
- Použiť OEM kvalita tesniaca páska príp predrezané tesnenia.
- Po zložení zľahka zahrejte na znovu aktivovať lepenie lepidla.
❌ Chyba #5: Utesnenie telefónu pred testovaním
Telefón spustíte len preto, aby ste zistili, že nová obrazovka nefunguje. Teraz ho musíte otvoriť všetko odznova.
Prečo je to riskantné
- Stráca čas a lepidlo.
- Opätovné otvorenie oslabuje hydroizoláciu.
- Riskujete jej poškodenie znova pri opätovnej demontáži.
✅ Urob to správne
- Pred konečnou montážou, pripojte novú obrazovku a naštartovať.
- Test pre:
- Odozva na dotyk
- Jas
- Mŕtve pixely
- Snímač odtlačkov prstov (ak je vložený)
⚠️ Bonusové chyby, ktorým sa treba vyhnúť
Statický šok
- Vždy používajte antistatické rukavice alebo podložka. Jediný zap môže smažiť váš IC obrazovky.
Batéria vľavo zapojená
- Aj keď je telefón vypnutý, prúd tečie. Najskôr odpojte batériu.
Strata skrutiek alebo použitie nesprávnych
- Miešanie veľkosti skrutiek môže prepichnúť vnútorné vrstvy. Zoraďte ich podľa oblasti.
🔧 Nevyhnutné nástroje pre nováčikov
- Plastové páčacie nástroje (nie kov)
- Prísavka
- Teplovzdušná pištoľ / horúcu podložku
- Antistatická podložka
- Magnetická skrutkovacia podložka
- Sada presných skrutkovačov
- Náhradné lepidlo
🛠️ Bezpečná vlastná výmena obrazovky: Krok za krokom
1. Prep
- Vypnúť
- Zhromaždite nástroje
- Čistý pracovný priestor
2. Demontovať
- Zahrejte okraje obrazovky
- Jemne vypáčte
- Odpojte káble batérie a obrazovky
3. Test
- Pripojte novú obrazovku
- Spúšťacie a testovacie funkcie
4. Znovu zostavte
- Odstráňte staré lepidlo
- Naneste nové lepidlo
- Nainštalujte novú obrazovku
- Zaistite skrutky
- Záverečné upratovanie
🤔 Mali by ste si naozaj DIY?
Buďme skutoční: DIY nie je pre každého.
Výhoda:
- Šetrí peniaze
- Spokojnosť, že si to opravíte sami
Nevýhody:
- Bez záruky
- Vysoké riziko zlyhania
- Časovo náročné
Tip: Ak telefón stojí viac ako $500, možno budete chcieť nechaj to na profíkov– pokiaľ si nie ste veľmi istý.
✅ Záver
Výmena obrazovky vlastného telefónu je úplne realizovateľná –ak sa vyvarujete začiatočníckych chýb. Od vypnutia zariadenia až po testovanie pred konečnou montážou, na každom kroku záleží.
Buďte opatrní. Buďte trpezliví. Buďte pripravení.
A nadovšetko, neponáhľajte to. Vaša obrazovka (a peňaženku) poďakuje sa vám.
❓ Často kladené otázky
1. Čo ak sa moja obrazovka po výmene nezapne?
Dvakrát skontrolujte pripojenie batérie a smer kábla. Môže to byť flex kábel, ktorý nie je správne usadený.
2. Môžem znovu použiť staré lepidlo?
nie. Staré lepidlo nebude bezpečne lepiť. Na utesnenie vždy naneste nové lepidlo.
3. Vyhrievanie je potrebné pre všetky modely telefónov?
Áno, najmä pre novšie modely. Lepidlo časom silnie – teplo ho bezpečne zmäkčuje.
4. Stratí sa vodotesnosť po oprave DIY?
S najväčšou pravdepodobnosťou, áno – pokiaľ nepoužijete správne vodotesné tesnenia a tmel.
5. Vyžaduje sa skúšobné spustenie aj pre úplne nové obrazovky?
Absolútne. Nové neznamená dokonalé. Pred konečným zatavením vždy otestujte.


