
📱 Εισαγωγή
Ραγισμένη οθόνη? δεν είσαι μόνος. Πολλές γενναίες ψυχές προσπαθούν να το φτιάξουν μόνες τους για να εξοικονομήσουν χρήματα – μόνο για να καταλήξουν να σπάσουν κάτι χειρότερος. Ακούγεται οικείο?
Η αντικατάσταση της οθόνης DIY μπορεί να είναι εξαιρετικά επιβράβευση… ή ένας ολοκληρωτικός εφιάλτης. Ειδικά όταν τα κοινά λάθη των πρωτάρηδων μετατρέπουν την επισκευή σας σε κηδεία για το τηλέφωνό σας.
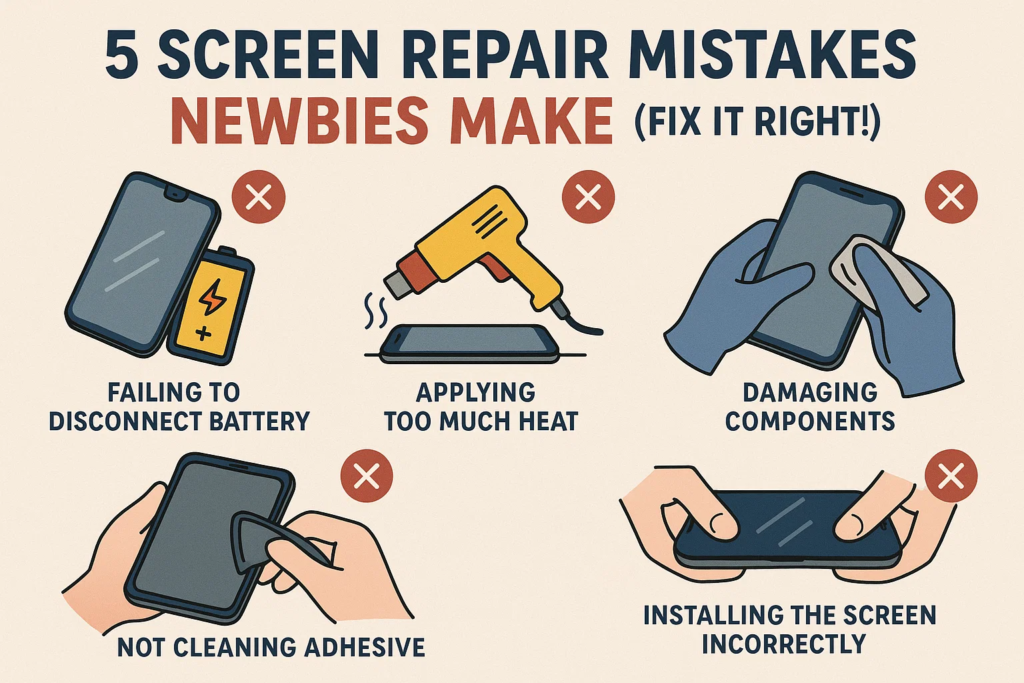
Αλλά μην πανικοβάλλεστε. Σε αυτόν τον οδηγό, θα σας δείξουμε 5 θανατηφόρα λάθη που κάνουν οι πρώτοι, πώς να τα αποφύγετε, και πώς να κάντε το με τον σωστό τρόπο. Ας σώσουμε το τηλέφωνό σας πριν να είναι πολύ αργά.
❌ Λάθος #1: Αντικατάσταση της οθόνης χωρίς απενεργοποίηση
Έχετε ακούσει ποτέ τη φράση «παίζοντας με τη φωτιά»? Αυτό ακριβώς κάνετε αν αλλάξτε μια οθόνη ενώ το τηλέφωνο είναι ακόμα ενεργοποιημένο.
Γιατί είναι επικίνδυνο
- Ρισκάρεις βραχυκύκλωμα βασικών εξαρτημάτων.
- Μπορεί να σας κάψει IC οπίσθιου φωτισμού ή χειρότερα—τη μητρική σας πλακέτα.
- Στατικός ηλεκτρισμός? Το αγάπες ζωντανά κυκλώματα.
Τι μπορεί να πάει στραβά
- Μαύρη οθόνη μετά την αντικατάσταση
- Καμία απόκριση αφής
- Μυρωδιά καμένου = $$$ επισκευή
✅Κάνε το σωστά
- Απενεργοποιήστε το τηλέφωνο εντελώς.
- Αποσυνδέστε την μπαταρία μόλις ανοίξετε τη συσκευή.
- Εάν δεν είστε σίγουροι, περίμενε τουλάχιστον 2 πρακτικά μετά το κλείσιμο.
❌ Λάθος #2: Χρήση ωμής δύναμης για την απενεργοποίηση της οθόνης
Δεν είστε σε διελκυστίνδα. Η οθόνη είναι κόλλητος, όχι βιδωμένο. Αλλά η χρήση βίας μπορεί λυγίστε το πλαίσιο, ζημιά στο εσωτερικό, ή να σχίσετε τα καλώδια.
Οι κίνδυνοι
- Σπασμένα θραύσματα οθόνης μέσα
- Λυγισμένο περίβλημα = η οθόνη δεν κάθεται στο ίδιο επίπεδο
- Σκισμένα εύκαμπτα καλώδια = χωρίς οθόνη ή άγγιγμα
✅Κάνε το σωστά
- Χρησιμοποιήστε α θερμικό πιστόλι ή ζεστό μαξιλάρι για να μαλακώσει η κόλλα.
- Διαφάνεια α πλαστική κάρτα ή σκύψτε το εργαλείο προσεκτικά.
- Να είστε υπομονετικοί. Αφήστε την κόλλα να απελευθερωθεί από μόνη της.
❌ Λάθος #3: Τοποθέτηση καλωδίων Flex με λάθος τρόπο
Αυτοί οι μικροί σύνδεσμοι μοιάζουν να ταιριάζουν με κάθε τρόπο—αλλά αυτό είναι μια παγίδα. Σύνδεση σε λάθος κατεύθυνση ή αναγκάζοντάς το αντίστροφα μπορεί να προκαλέσει σοβαρή ζημιά.
Προειδοποιητικά σημάδια
- Δεν υπάρχει οθόνη ακόμη και μετά την εκκίνηση
- Παράξενες γραμμές ή τρεμόπαιγμα
- Άμεση μαύρη οθόνη κατά την τροφοδοσία
✅Κάνε το σωστά
- Ψάξτε για το χρυσές καρφίτσες και κατεύθυνση εγκοπής.
- Ποτέ μην ζορίζετε! Αν δεν γλιστράει εύκολα, το κάνεις λάθος.
- Χρησιμοποιήστε τσιμπιδάκια, όχι τα δάχτυλα.
❌ Λάθος #4: Αγνοώντας την κόλλα στεγανοποίησης ή τη φλάντζα
Μπορεί να σκεφτείς, «Είναι απλώς κόλλα». Λανθασμένος. Αυτή η μαύρη λαστιχένια σφραγίδα κρατά τη σκόνη και το νερό έξω. Περάστε το, και θα το μετανιώσετε την πρώτη φορά που θα χύσετε νερό στο τηλέφωνό σας.
Οι Συνέπειες
- Χαλαρές γωνίες οθόνης
- Ζημιά από το νερό
- Βρωμιά μέσα = άγγιγμα που δεν ανταποκρίνεται
✅Κάνε το σωστά
- Αφαιρέστε εντελώς όλη την παλιά κόλλα.
- Εφαρμόζω Ποιότητα OEM στεγανωτική ταινία ή προ-κομμένα παρεμβύσματα.
- Θερμάνετε ελαφρά μετά τη συναρμολόγηση σε επανενεργοποιήστε τη συγκόλληση κόλλας.
❌ Λάθος #5: Σφράγιση του τηλεφώνου πριν από τη δοκιμή
Εκκινείτε το τηλέφωνό σας μόνο για να διαπιστώσετε ότι η νέα οθόνη δεν λειτουργεί. Τώρα πρέπει να το ανοίξετε όλα από την αρχή.
Γιατί είναι Επικίνδυνο
- Χάνει χρόνο και κόλλα.
- Η επαναλειτουργία αποδυναμώνει τη στεγανοποίηση.
- Κινδυνεύετε να το καταστρέψετε πάλι κατά την εκ νέου αποσυναρμολόγηση.
✅Κάνε το σωστά
- Πριν την τελική συναρμολόγηση, συνδέστε τη νέα οθόνη και εκκίνηση.
- Δοκιμή για:
- Απόκριση αφής
- Λάμψη
- Νεκρά pixel
- Αισθητήρας δακτυλικών αποτυπωμάτων (εάν είναι ενσωματωμένο)
⚠️ Λάθη μπόνους προς αποφυγή
Στατικό Σοκ
- Να χρησιμοποιείτε πάντα αντιστατικά γάντια ή χαλάκι. Ένα μόνο zap μπορεί να τηγανίσει το IC της οθόνης σας.
Μπαταρία αριστερά στην πρίζα
- Ακόμα κι αν το τηλέφωνο είναι απενεργοποιημένο, ρέει ρεύμα. Αποσυνδέστε πρώτα την μπαταρία.
Απώλεια βιδών ή χρήση λανθασμένων βιδών
- Η ανάμειξη μεγεθών βιδών μπορεί τρυπήστε τα εσωτερικά στρώματα. Ταξινομήστε τα ανά περιοχή.
🔧 Εργαλεία που πρέπει να έχετε για αρχάριους
- Εργαλεία πλαστικής κοπής (όχι μέταλλο)
- Αναρρόφιο
- Θερμικό πιστόλι / ζεστό μαξιλάρι
- Αντιστατικό χαλάκι
- Μαγνητικό βιδωτό πατάκι
- Σετ κατσαβιδιών ακριβείας
- Ανταλλακτική κόλλα
🛠️ Ασφαλής αντικατάσταση οθόνης DIY: Βήμα-Βήμα
1. Προετοιμασία
- Απενεργοποιήστε
- Συγκεντρώστε εργαλεία
- Καθαρός χώρος εργασίας
2. Αποσυναρμολογήστε
- Θερμάνετε τα άκρα της οθόνης
- Ανοίξτε απαλά
- Αποσυνδέστε τα καλώδια της μπαταρίας και της οθόνης
3. Δοκιμή
- Σύνδεση νέας οθόνης
- Λειτουργίες εκκίνησης και δοκιμής
4. Συναρμολογήστε ξανά
- Αφαιρέστε την παλιά κόλλα
- Εφαρμόστε νέα κόλλα
- Εγκατάσταση νέας οθόνης
- Ασφαλίστε βίδες
- Τελικός καθαρισμός
🤔 Πρέπει πραγματικά να κάνεις DIY?
Ας είμαστε αληθινοί: Το DIY δεν είναι για όλους.
Πλεονεκτήματα:
- Εξοικονομεί χρήματα
- Ικανοποίηση να το φτιάξεις μόνος σου
Κατά τα βοηθήματα:
- Καμία εγγύηση
- Υψηλός κίνδυνος αποτυχίας
- Χρονοβόρο
Ακρο: Εάν το τηλέφωνο κοστίζει περισσότερο από $500, μπορεί να θέλετε αφήστε το στους επαγγελματίες-εκτός αν έχεις μεγάλη αυτοπεποίθηση.
✅ Συμπέρασμα
Η αντικατάσταση της οθόνης του τηλεφώνου σας είναι απολύτως εφικτή—αν αποφύγεις τα λάθη των πρωτάρηδων. Από την απενεργοποίηση της συσκευής σας μέχρι τη δοκιμή πριν από την τελική συναρμολόγηση, κάθε βήμα έχει σημασία.
Να είστε προσεκτικοί. Να είστε υπομονετικοί. Να είστε προετοιμασμένοι.
Και πάνω από όλα, μην το βιάζεσαι. Η οθόνη σας (και πορτοφόλι) θα σε ευχαριστήσει.
❓ Συχνές ερωτήσεις
1. Τι γίνεται αν η οθόνη μου δεν ενεργοποιηθεί μετά την αντικατάσταση?
Ελέγξτε ξανά τη σύνδεση της μπαταρίας και την κατεύθυνση του καλωδίου. Θα μπορούσε να είναι ένα εύκαμπτο καλώδιο που δεν έχει τοποθετηθεί σωστά.
2. Μπορώ να ξαναχρησιμοποιήσω παλιά κόλλα?
Οχι. Η παλιά κόλλα δεν θα κολλήσει με ασφάλεια. Εφαρμόζετε πάντα νέα κόλλα για σφράγιση.
3. Είναι απαραίτητη η θέρμανση για όλα τα μοντέλα τηλεφώνων?
Ναί, ειδικά για νεότερα μοντέλα. Η κόλλα γίνεται ισχυρότερη με το χρόνο—η θερμότητα την μαλακώνει με ασφάλεια.
4. Θα χαθεί η αντοχή στο νερό μετά την επισκευή DIY?
Πιθανότατα, ναι—εκτός εάν χρησιμοποιείτε κατάλληλα αδιάβροχα παρεμβύσματα και σφραγιστικό.
5. Απαιτείται δοκιμαστική μπότα ακόμα και για ολοκαίνουργιες οθόνες?
Απολύτως. Νέο δεν σημαίνει τέλειο. Πάντα να δοκιμάζετε πριν από την τελική σφράγιση.


